I thought it would be fun to occasionally go through shots to look at how they are built. So here is my first ever step-by-step walkthrough. This is not a very complicated shot, but it is my first time, so be nice.
Almost every thing I shoot is HDR so the result that I post is a combination of 3 or more exposures. In this case it is 5 (why 5? Uhm, I have no real answer for that other than it seemed like a good idea at the time...).
So here are the original 5 exposures:
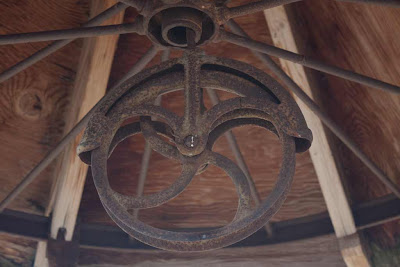 This shot is at the camera's recommended setting.
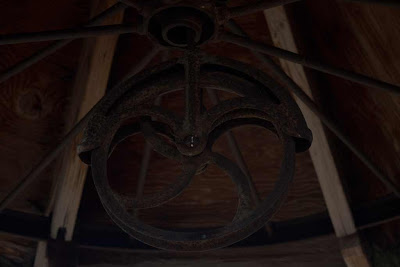 This shot is two stops underexposed (-2ev) relative to the camera's recommended setting.
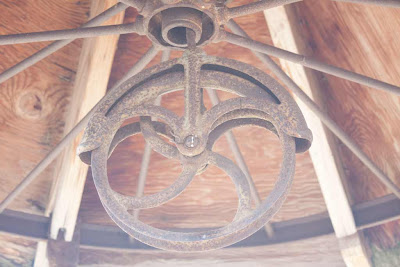 This shot is two stops overexposed (2ev).
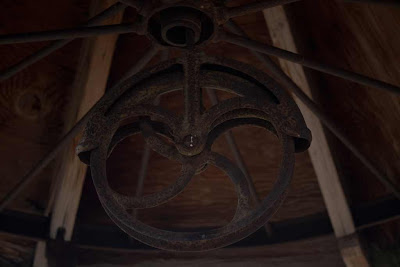 This shot is one stop underexposed (-1ev).
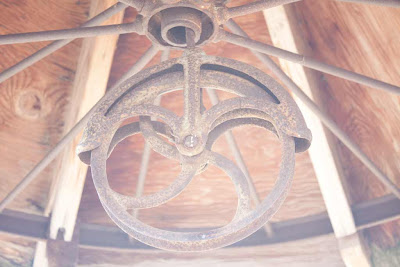 This shot is one stop overexposed (1ev).
I am always horrified by what RAW photos look like, since they do not have any white balance correction, etc. When you look at the ±ev shots, it is even worse. Before I make any adjustments to the shot, I will build the HDR. The idea behind the HDR is that it gets the extra color data from the over- and underexposed photos and uses that data to expand the color space of the photo. The problem with HDR is that it is really easy to overprocess the shot and have unrealistic looking photos. So here we go:
I use Lightroom for most of my adjustments, Photoshop for advanced adjustments, and Photomatix Pro to build my HDRs. Select your RAW files and open them in Photomatix.
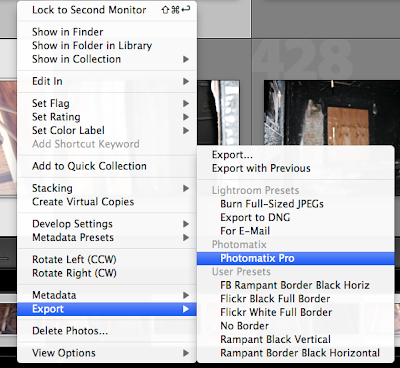
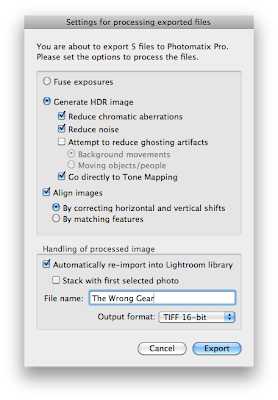 In Photomatix, I don't generally make many adjustments. In this case I have used the defaults, but made sure that Smoothing is set to Max. In general the less smoothing you use, the more unrealistic your photo will look.
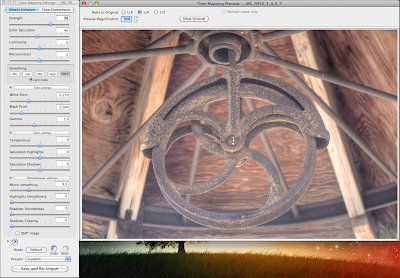
Save your photo. I will make the next several adjustments in Lightroom, but you can make similar adjustments in Aperture, Photoshop, Photoshop Elements, GIMP, etc.
The first thing I want to do on this photo is increase the contrast. In this case I am using the Tone Curve — Strong Contrast preset. This preset makes the following changes to the Tone Curve: Highlights +8, Lights +15, Darks -15, Shadows -30.
The next preset I apply is the General — Punch tool. This increase clarity by +50 and vibrance by +25.
The final step in Lightroom is the General — Auto Tone preset. This preset will often change settings that you have made, so make sure you like the result before applying.
The shot is OK right now, but there is a lot of cool rust detail that could be greatly enhanced by applying a High Pass Filter, so open the image in Photoshop.
In Photoshop you will want to duplicate the background layer.
From the Filter menu select High Pass... from the Other sub-menu.
When the High Pass dialog opens, move the radius slider back and forth until you find the correct setting. In this example, I used 24.1 pixels. The High Pass filter is an excellent way to sharpen an image because it only sharpens the edges and not the middle of the object. The grayish (bump map) image that you see when you play with the slider basically shows you how extreme the edges will be.
Click OK and you will be presented with one of the most horrifying versions of your lovely image that you thought possible. Don't Panic! We're not done.
In the Photoshop Layers panel, click on the Blend Mode menu (unfortunately unlabeled, but it is a dropdown menu that normally says Normal) and select Multiply.
This option will return sanity to your image.
Normally, this would be a good place to stop. On this particular trip, I forgot my 50mm prime lens. I would really like to emulate the shallow depth of field that would have been possible with my 50 prime, but is not possible with the kit lens I was shooting with. I am going to apply a selective focus effect.
It is normally a bad idea to do anything destructive to your original photo. Most people prefer to apply layer effects rather than modify the original file. This is not what I did in this case for 2 reasons: 1) I have a reasonably current version of the file in Lightroom (LR exports a copy of the file to Photoshop for editing by default). 2) I needed to duplicate the background layer AND the High Pass effect. So, I did the unpardonable sin and flattened the image.
The next step is to duplicate your newly flattened layer.
Select the new layer from the Layers window. From the Filter menu, select Gaussian Blur... from the Blur sub-menu.
In the Gaussian Blur options screen, play with the Radius slider until you find the desired amount of blur. This will be the maximum amount of blur along the outside of your image. In this example, I used a 20 pixel radius. Click OK.
This is another DON'T Panic moment. Your photo will be completely blurry at this point.
The next step is to create a Layer Mask. The layer mask basically punches a hole in the top layer and lets the bottom layer shine through. Any place on the mask that has black will show the lower layer. Create a Layer Mask by clicking the  button.
 button.
Select the  Gradient tool. Make sure the a the gradient settings in the Options bar match these:
  . You will want to make sure the gradient is the black to white gradient and that you are using a radial gradient. This will start with black in the middle and fade to white in a circle.
 Gradient tool. Make sure the a the gradient settings in the Options bar match these:
  . You will want to make sure the gradient is the black to white gradient and that you are using a radial gradient. This will start with black in the middle and fade to white in a circle.
Move to the put the cursor on the focal point of the photo and then click and drag toward the outside of the photo. This will probably take several times until you get the image just right.
Once you have correctly created the gradient, the Layer should look something like this in the Layers window:  .
.
 .
.Your final image should look something like this:


